
IN THIS ARTICLE:
Why shy types need a chalkboard serving tray
at parties, where to get materials, video tutorial
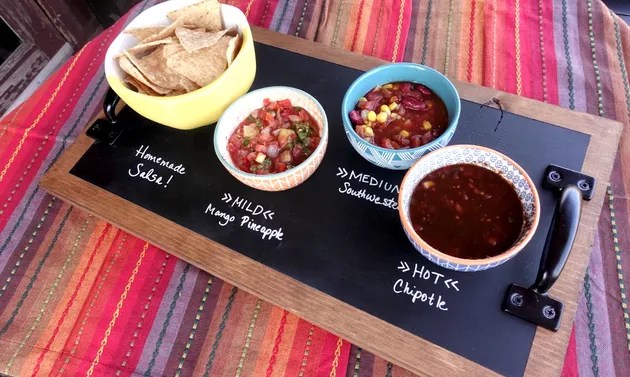
I’ve always been a fan of setting little ID place cards in front of appetizer items at get togethers. They’re great for me as a guest so I don’t have to barge into the middle of a heart-to-heart the host is having with a friend she hasn’t seen in forever to ask “so sorry to interrupt, but are these the asparagus or the broccoli quiches?” And though I don’t play host very often, I like them because those little food identifiers can take on some of the hosting duties for me. Also useful when you’ve got to bring something to a potluck, so people won’t have to keeping asking you “hey, what kind of cookies are these again?” Well, I’ve got a DIY solution that’s way better than those little pieces of propped up paper.
When I saw this cool DIY chalkboard serving tray by Shanty2Chic, I knew that I wanted to create a video version of this project for eHow. The main difference between mine and the original is that I used front-mounting door pulls for the handles so that they can be screwed on from the top, whereas the original project used gorilla glue to fasten on rear-mounting drawer pulls. I also stained my board using a non-toxic, fume-less gel stain from DecoArt.
Here’s what you’ll need:
- 3/4-inch thick wood board (desired size — I used 11 ¼x 20)
-
Fine grit sand paper or sanding block
-
Non-toxic wood stain or finish, I used Deco Art Americana in Walnut
-
Painter’s tape (easy-release ProTape is great)
-
Paint primer (spray recommended)
-
Chalkboard paint (spray recommended)
-
Drawer/cabinet pulls (front mounting recommended)
-
5/8-inch screws
-
Felt pads (optional or recommended if using back mounting hardware)
Check out my video below, and head on over to eHow for the full instructions.
