Here’s the Thing About Introverts with Social Anxiety: We Disappear From Time to Time

annie_sweater - 1

Where’d you go? And when are you finishing my heckin’ turtleneck?


IN THIS ARTICLE:

Ok, so I’m really, really bad at blogging; Hey, it turns out that I’m totally ok with being bad at blogging; Redefining blogging success for myself


People come, people go
Sometimes without goodbye, sometimes without hello
She’s got one magic trick
Just one and that’s it
Ooh… She disappears

It’s like, now you see her, now you don’t
You think you’re gonna get to know her now, well you won’t
She’s got one magic trick
Just one and that’s it
Ooh… She disappears

–  M. Ward, “Magic Trick” (from the album Post War)

Welp, guys, I guess I’ve done it again. I promised regular updates to you all and I didn’t deliver — which is, like, a cardinal blogging sin. Don’t give readers any expectations that you can’t live up to. And now, writing a new blog post feels like sitting down to write that long-overdue response email to an old friend. When the longer you wait, the more shame you feel, the more the anxiety builds, and the less likely you are to ever write it at all. At first you think about whipping out one of those fictional, I-never-got-your-email scenarios you keep in reserve: “Oh man, sorry it took so long — your email was sent to my spam folder for some strange reason”; “I’ve been getting so many emails lately that this got buried in my inbox”; “My account has been acting really weird and sometimes my emails get lost!” You know the ones.

So, all of this to say that I haven’t updated in a while because my inner critic was being a total asshole. I was ashamed for having had this grand idea of reaching out to self-doubting introverts around the world and trying to hook them on crafting — just to abandon it at the first sign of my own self doubt. Classic me. I was embarrassed to have told people whom I highly respected that I was going to truly get serious about this site. Maybe I could turn it into an actual self-sustaining thing. I mean, I pay my bills by creating web content to help corporations build an audience  — why not create content for my own blog and build something for myself?

maya_bed - 1

Furball and me in hibernation.

A few people I told were actually quite enthusiastic about the idea of marrying the world of arts & crafts (and creative pursuits in general) with social anxiety/introversion support. A few even visited regularly, giving me the initial energy to continue plugging away at it. Though terrifying (I mean, I’m terrified right now) it felt liberating to write honestly and openly about my anxiety in a way I’d never done before.

But then the site visits dropped, as they will. The thumbs up and hearts dwindled on social media. I became obsessed with the numbers. I did what everyone tells you NOT to do when tossing your own precious content into the vast, undulating, ever expanding sea of digital media and its mercilessly fickle audience: I was taking the numbers personally.

Of course I was failing at this, I told myself. I just don’t possess the grit…the determination a person needs for this emotionally grueling enterprise. I’ve got social anxiety for f*ck’s sake — nothing scares me more than the act of public self-promotion.

But then something happened between my last post and this one. I lowered the bar I’d set for myself. A LOT. Blogging success no longer means growing a large audience or, hell, even a small audience.

| “Sometimes if you build it, they won’t come. And frankly, in this age of content overload, they probably won’t.” |

Or not…it’s all good.

But hey — that’s ok. Maybe no one ever reads this post — or any other post I create henceforth. Or maybe a lone person, riddled with anxiety and self doubt, reads something I’ve written here and for a fleeting moment, feels understood. Or if someone surfs in and gets inspired to learn how to knit. Well if so, then praise be, ’cause that sure AF spells success for me.

Low Carb Double Chocolate Truffle Pie (With Vegan Option)

DSC01653


IN THIS ARTICLE:

A decadent yet low carb recipe for the out-of-control chocoholic.
Oh yeah, and it’s really easy.


Ok, so this isn’t a very inventive recipe, but it sure is tasty. Basically, it’s a cookie crust filled with chocolate ganache and chilled until set. In fact, it was borne from my own laziness. How so? Because I had planned to make regular chocolate truffles but decided that I didn’t want to go through all the bother of rolling out individual, melt-in-your mouth morsels and then dusting/coating them afterward. I also didn’t want to bother with using a double boiler, tempering, or any of that other stuff serious foodies/chefs do because I’m not really that fussy.

Instead of all that, I opted to make a soft-setting ganache that I could easily spoon into a simple pie crust and just leave it at that.

DSC01887

The result was a rich, bittersweet dessert that tastes a lot harder to make than it really is.

To make the filling less firm than a normal truffle, I used mostly Mexican table cream (media crema) instead of 100% heavy cream. It’s available in most US grocery stores near the cans of evaporated and sweetened condensed milk and/or in the Mexican food section. I suppose you could also use half and half or all heavy cream, but media crema is thicker, creamier, and produces a more decadent-tasting treat, in my opinion.

I actually ended up loving this more than I do plain old truffles. And I have a lot of love for plain old truffles. It also really impressed a couple of foodie friends of mine who are neither grain-free nor low carb eaters, which gave me the confidence to share the recipe with y’all.

What’s more, it’s totally vegan-option friendly. Enjoy!

Easy Low-Carb Double Chocolate Truffle Pie

Filling Ingredients

8 ounces unsweetened baking chocolate, finely chopped
2/3 cup confectioners sweetener (or more to taste) like Swerve. Splenda granular will also work.
12 oz. media crema (I used Nestle brand) (see * for vegan) If you don’t have access to this, use heavy cream in its place
1/2 cup heavy cream*
2 tablespoons butter*
1 tsp vanilla extract
Dash salt

Chocolate Grain-Free Crust Ingredients

1 cup blanched almond flour
3 tablespoons melted butter*
1 tablespoon unsweetened cocoa powder
2 tablespoons “brown sugar” substitute sweetener (I used Lakanto Gold) or any granular sweetener of choice

Optional toppings: chopped nuts of your choice for topping, coarse sea salt

*Vegan subs: Use full fat coconut milk in place of cream. For butter, use Earth Balance baking sticks or coconut oil.

Directions

Finely chop the unsweetened chocolate by hand or use a food processor.

DSC01700

In a heavy-bottomed saucepan, mix media crema, heavy cream (or coconut milk/cream), butter (if using) and sweetener, then heat over medium low, stirring frequently. DO NOT leave the stove at any time during this step. You want to make sure that your cream does NOT burn nor get too hot. If it overheats, your ganache will separate and turn into a gloppy, oily mess. You don’t want that.

DSC01703

Once the cream mixture starts to steam, reduce to low heat. Stir in chopped chocolate. At first, before the chocolate has been fully incorporated, the mixture will be a dull grayish brown color, like this:

DSC01711

Just continue stirring and it will eventually become a deep, silky, gorgeous, ganache.

DSC01734

You should taste your ganache at this point to see if the sweetness is to your liking. If not, add more confectioner’s sweetener and stir well until it’s incorporated. Turn off heat and set aside.

DSC01779

To make the crust, preheat oven to 350°. Add all crust ingredients to a large bowl and throughly mix by hand. It should be crumbly, but easily clumped together. Press into a pie or tart pan. Prick bottom and sides with a fork and bake for 11 or 12 minutes. Let cool.

DSC01824

Spoon the chocolate ganache into the cooled crust. Top with chopped nuts if you’d like.
Place in fridge for a few hours until set.

DSC01850

Serve on its own or with whipped or coconut cream. It’s a very dense, intensely chocolatey dessert, so the fluffy cream helps balance it out. But if you love your chocolate rich and bittersweet, you’ll be happy going sans cream.

DSC01674

How To Make Cement Candles (Plus How to Deal With Epic DIY Fails)

NEW concrete candles - 1.jpg


IN THIS ARTICLE:
Making friends with DIY mistakes;
No such thing as too many candles, am I right?


Remember those concrete candles I blogged about last month? After some trial and error, I finally delivered my final video (above) and written tutorial (found here on eHow). I also went with cement and not concrete. I’m happy with the final outcome but, man oh man, the road there wasn’t exactly a straight line (even though the video makes it appear so.)

Thing is, folks, this wasn’t the first video I created for this project. The first was more than a bit problematic, and I knew it when I was shooting and editing it — but I was so effing frustrated that I finished the damn thing, skipping over some important steps in order to edit out all of the problematic bits, and was ready (SO ready) to submit it and wash my hands of it all.

Here was the main (but not the only) problem — I didn’t use a mold-release agent (like Pam) because some people said that it would discolor the cement AND I was pretty sure that it would be fairly easy to cut open the plastic containers I chose with a utility knife. WRONG. I could tell you how wrong, but it’s easier just to show you.

In the end, I used a rotary tool to cut the candles out of the molds (like you would a mended limb from a plaster cast). Every single candle got damaged, but I just shot them from their good angles.

But then questions came in about the process and “what kinds of containers did you use that you could easily cut with a knife?” and I knew that the tutorial — as is — was simply not going to fly. It was also well below my own standards, and I knew it. So, I apologized for my less than stellar work, scrapped the whole video, and started from scratch.

Days of work down the drain? Loads of materials wasted? Nope. Not at all. This is going to sound cliched and Pollyanna but these mistakes were a learning experience. All part of the DIY process. Love your mistakes fellow crafters. Love every single one. 

Veteran crafters already know the importance of learning from mistakes (and even embracing them in an ahem-I-totally-meant-to-do-that sort of way), but if you’re new to the maker game, an epic fail may put you off of ever trying to make anything again.

But here’s a secret so many DIYers keep hidden: rare is the project that is totally straightforward and smooth sailing, no matter how simple it may appear. There are just too many variables (read: a million different ways to screw it all up), and tutorial creators can’t account for (read: warn you about) them all.

How to start a project over without going crazy (or how I do it, at least)

  1.  Breathe deeply and slowly count to 10.
  2. Visualize the changes that you’ll make to the process and how much smoother take two will be.
  3. Visualize the outcome.
  4. Most importantly, if you have the time, start over THE NEXT DAY. If you’ve just spent hours attempting to do something, the minute you realize you’ll have to start over is the worst. You’re still hot-headed and recovering from the irritation of your frustrated attempts. Trust me, you will feel so much less hot-headed the next day, and when things go smoother for you (because of all the lessons learned) your previous failure(s) will be like a distant memory.

Embrace the Fail

We’ve all heard that stories about how some of humankind’s most important (or just plain cool) discoveries were borne from mistakes:

  • Penicillin
  • The microwave oven
  • Fireworks
  • Scotchguard upholstery protector
  • The Slinky

Made a mistake you made when knitting your sweater sleeve? Consider embracing it and repeating the same mistake on the other sleeve. Could turn out looking pretty cool. Symmetry is a DIYers friend!

Totally screwed up a lattice pie crust or other baked good, just slap the word “rustic” in front of the recipe and call it a day. Same goes for a bad paint job on a craft. Other options: weathered, aged. Want to leave something unfinished? Try industrial or deconstructed. And of course there’s the old familiar standby (albeit currently out of fashion) — shabby chic.

In the case of my candles, the wax seeped through the cracks and coated some of the cement. I could have sanded those down, but the effect looks kinda neat, right? Also, I’m digging the porous look created by the accidental air bubbles.

sneak-peak-9-16 - 1.jpg

Some of the cement was also discolored by the wax, but this gave them a terrific stratified look. In fact, I might like these more than the cleaner ones.

cool-candle-mistakes.jpg

And, best of all, I ended up with a bunch of candles. I love candles. Can’t have enough. So the whole experience was a win-win-win as far as I’m concerned.

Make this Easy Faux Coral Sculpture!(Video)

coral-sculpture-hero

Image: Maya Marin | eHow


IN THIS ARTICLE:
I loves me a bargain; When it comes to decor, faux can be your friend


I’m just gonna come right out and say it. I’m cheap, y’all. Unless we’re talking about dog food (my dog dines better than I do, no question) or paying/tipping people for friendly services well rendered, I’m always going to figure out how to get the most bang for my buck. This means I will either: a) find a way to make the wanted items myself or b) patiently search high and low for the best deals.

Truth be told, my love for making stuff stems as much from my characteristic thriftiness (which I’m pretty sure I inherited from my mom) as it did my innate desire to create.

All of this to say that I’m not opposed to faux organic decor (including plants — check out my post on how to make fake plants look real!), if that means I’m saving money and/or time by going faux. But it does NOT mean that I will settle for having stuff in my house that I’m not 100% aesthetically pleased with.

Case in point — my DIY’ed faux coral sculpture which I proudly display on my living room bookcase:

Image: Maya Marin | eHow

It’s a huge (el-cheapo) IKEA bookcase that’s a whole lot darker than I’d prefer it to be, so I really wanted to add pops of color to the shelves (to draw attention away from the overt IKEA-ness of the bookcase). I love the shape and hue of red coral, but buying authentic coral (as much as I’d love to have it) was out of my price range.

205-euro-sculpture.jpg

Do you know how much premium dog food I can buy with €205? No thanks. (Boulesse.com)

So, I researched my DIY options, and found this genius method (on Ohohblog.com) for making faux coral using wire, hot glue, and paint — stuff I already had in my craft stash anyway. If you make stuff on the regular, you probably do as well. If you don’t, these materials  are very affordable and can be used for literally hundreds of other projects.

I pitched a faux coral video tutorial to eHow and they loved it. So I made it, and now I present it to you. Hop on over to eHow for my full tutorial.

To obtain this lovely shade, I used mostly Delta Ceramcoat Deep Sea Coral with a few drops of Americana True Red.)


Dude, Where’s My Cardigan?: Husband’s 2012 Christmas Gift Progress Report

Dude-cardigan-hero2


IN THIS ARTICLE:
Making good on your promises to those you love
even when life gets weird.


We’ve got loads of reasons for leaving business unfinished. Like, there are some things that you don’t finish out of a crippling perfectionism — the kind that tells you that if a thing won’t be perfect, it isn’t worth finishing. Or there are some things you don’t do because you’re really busy and they’re not as high on your priority list. And then, of course, there are the things you leave unfinished out of sheer laziness. All can be shame-inducing.

But there’s a special kind of shame reserved for when you’ve promised to make something for a loved one for a special occasion that you had every intention of finishing on time for that occasion, but you don’t.

Such is the case with this cardigan I promised to my husband for Christmas. Christmas 2012.  It is now October 2017. Or, wait a minute — maybe I promised it to him for his birthday? Who knows, I can’t even remember. All I know is that I started making the thing five years ago and have promised to finish it every subsequent year, but life got weird. Weird how? Work stressed me me out. Work stressed him out. We were stressing each other out. Resentments festered. Etc.

IMG_9504

#FBF to that time in 2014 when I posted on Instagram about how I was making progress. Ha!

To make matters worse, this isn’t just any cardigan — it’s the “Dude” cardigan. Yep, the famed ’70s Pendleton worn by Jeff Bridges in The Big Lebowski. An article of clothing I chose to DIY for my husband because he’s been a HUGE fan of the Coen brothers since he was a youth growing up in a small town in Northern Ireland with this crazy, far-fetched ambition to one day move to Los Angeles to work in the entertainment industry. Such was his love for the big screen. And the small screen. All the screens.

facebook-post-9-16

#TBT to that time, in 2016, when I said I just might “actually be able to finish” it. Double ha!

With much hard work and persistence (on top of natural talent, of course), my amazing dude uprooted his life and moved halfway across the world to make his goal a reality. Even when life got weird.

dude6-cl1c-sweater

Image: The Big Lebowski | Gramercy Pictures

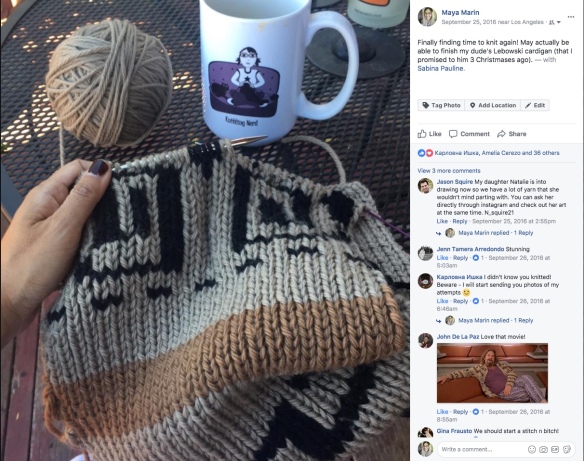
I, on the other hand, chickened out of my childhood career ambitions, moved a mere 30 miles from where I grew up, and I can’t even finish a lousy cardigan for the person I love most in the world.

Of course, I could continue using the “poetic” excuse of taking the same laissez-faire attitude while making this cardigan as the Dude himself took throughout the film. That is, “the Dude abides” unchanged as all hell breaks loose around him.

But, and I’m going to be super frank now, one of the biggest reasons I didn’t put in the time and effort to finish this cardigan for my husband was resentment. I was depressed and dissatisfied with my life. Consumed by a job that was only leading me farther away from where I wanted to be. He was busy with a career that was blowing up. And resentment manifests in all sorts of ways — like being unwilling to put in the extra effort at the end of a tiring day to make good on a promise years ago. And, in more ways than one, this cardigan seemed to epitomize his success and my (perceived) failure. Resentment makes us conjure up crazy symbolism like that.

front-from-top

A month ago, it was two pieces of knit fabric. Now, it’s an actual vest! A wearable thing. Two sleeves and a collar away from done.

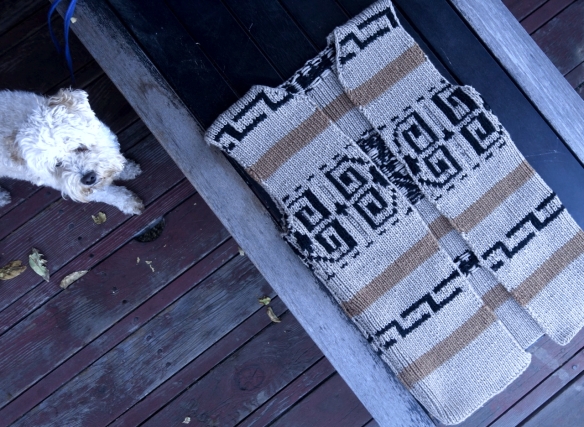
But no more. I hereby proclaim THIS to be the year. Not just for finally finishing this cardigan, but for making a greater commitment to finish what I start. To actively pursue and take responsibility for my own happiness. To love my loved ones like there is no tomorrow. Unconditionally. All of those things we know we should do but don’t — until tragic things happen in the world that remind us that tomorrow is never, and was never, guaranteed.

back-sideways

The back.

So Los Angeles had better have a cold, cold winter this year, especially after the record-breaking heat we’ve had throughout the fall. Otherwise, my husband’s going to be sweating buckets wearing this thing on Christmas morning.

front-sideways

This terrific knitting pattern can be found at andreaknits.com/dude.

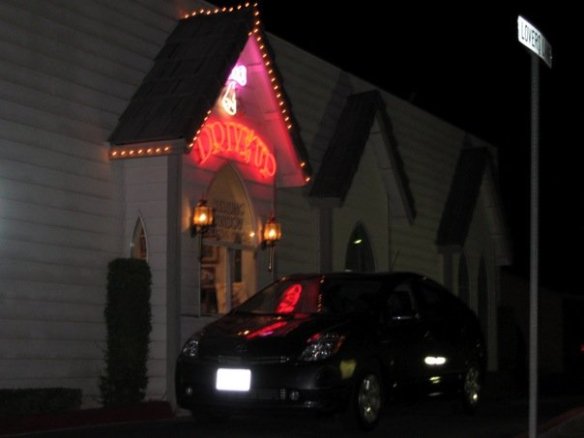
Oh yeah, and I think it’s also fitting to announce that 10 years ago on this day, we got married inside a Toyota Prius in a drive-thru wedding ceremony in Vegas.

Here we are, driving down the aisle.

Love, American style.

And ordering. I think we had the dinner combo.

One wedding please, supersized.

Looking forward to 10 more years with my dude.

How To Make Nail Polish Marbled Mugs (Video)


IN THIS ARTICLE:
Are all homebodies as obsessed with mugs as I am?;
Use dollar store nail polish to make a set of marbled drinkware


I certainly enjoy a hot beverage. On any given day, I’d say that I drink between 8 – 10 large mugfuls of hot drinks total. That would be a combination of coffee, tea, and the occasional hot chocolate. Even in hot weather. As a result, I come into visual and physical contact with my mugs a lot — which has made me grow (ridiculously) fond of them.

I have this theory that we homebodies can come to view a select few of our inanimate household items as more than mere objects, but as our familiars (in lieu of actual humanoid types)…which I realize sounds creepier than I mean for it to sound, but I don’t know how else to put it. Ok, fine, I guess it is kinda creepy.

Plus, I seriously think beverages taste better when I get to sip them out of a lovely ceramic vessel. I really do! A romantic delusion no doubt, but I can’t deny that it adds an extra shot of enjoyment — dare I say, joy — to my day. And I ain’t arguing with joy.

Furthermore (yes, there is a furthermore) I also just now realized that I tend to grab a mug when a photo is being snapped for whatever reason. Gives me something to do with my hands, I suppose? But they also make me feel grounded…secure. Please tell me I’m not alone in this.

mugging

Mugging for the camera

Ok, enough with the weirdo-ass mug love and onto the DIY!

Given my inexplicable mug fetish, you can just imagine how excited I was to learn that I could take some plain old mugs from IKEA and turn each and every one of them into a colorful, one-of-a kind, marbled masterpiece using nail polish. Even the cheap dollar store kind. Oh yeah. Exciting stuff.

And the process is so simple, a one minute video is all you really need to learn how to do it. So without further ado, allow me to present a one minute video. (Then check out my full eHow tutorial here for some added tips.)

How To Make Fake Plants Look Real (VIDEO)

Quick — which one is the fake? (Yes, this is a trick question.) [Image: Maya Marin | eHow]


IN THIS ARTICLE:
How to rock faux plants like no one’s business.
(Seriously, it really is no one else’s business);
where to get the plants from the video


So you’ve tried time and again to keep houseplants happy and well. Yet, every time, you’ve shamefully failed to protect your green friends from slowly withering away as they cursed Fate for having fallen into your incapable hands.

Yeah. Me too. So I say, go faux. At least partially.

What?, you say. Me own FAKE plants? Those cheap, soulless, tacky, plastic abominations that will have you forever living in fear of being discovered for the fake-plant-owning-brown-thumbed-serial-flora killer that you are?

Yup. Say what you want, but I’ll have you know I went faux and I’m in good company.

But even more convincing than knowing that there are interior design legends who have embraced fake greenery is actually seeing how REAL fake plants can look provided you get quality fakes and style them well. I was so excited about the whole endeavor that I decided to pitch an idea for a video to eHow — (X Number) of Tips For Decorating With Faux Plants — and they bit.

Me, throwing in a real, fresh-cut tree branch for optimum fake-out! [mage: Maya Marin | eHow]

Of course, I had no idea what my tips would be before I pitched the idea — because that’s how I roll! I also didn’t know where I was going to buy plants that were realistic enough to fool the eye. I knew one thing for sure, though, I needed to see them IN PERSON before buying. No matter how many awesome online reviews a product gets, you never know for yourself until you lay your eyes — and hands — on the goods.

Now, I’m convinced that if you style them correctly, no one will be the wiser. Or you might be like me and just flat out tell them that they’re fake — and so, far, everyone’s been surprised to learn the truth.

So now, I enjoy the calming beauty of greenery in my home without the stress of having to keep them alive.

Pretty dang convincing faux croton plant. (Image: Maya Marin | eHow)

And without further ado, here’s my final video! And don’t forget to read my full article on eHow. (See images below to find out where I bought my fauxs.)

(Image: Maya Marin | eHow)

(Image: Maya Marin | eHow)

How A Capsule Wardrobe & An App Helped My Anxiety Big Time


IN THIS ARTICLE:
I, a pathological clothes collector, got rid of 90% of
my wardrobe and it was the best anti-anxiety decision ever;
the ah-mazing wardrobe organizer app that helped me;
I admit that it’s not for everyone


I love clothes. Let me repeat that for emphasis. I lu-hu-hu-HUUUUUV clothes.

Not sure how to say that in a way that sufficiently conveys my deep, emotional connection to those glorious pieces of fabric joined together to protect our bodies from the elements.

Still, the affection I had for my garments (many of them I constructed myself) did not stop me — approximately 8 months ago — from donating 14 large moving boxes full of them to the Goodwill. Percentage-wise, that was about 90% of my wardrobe, and I’m still not finished paring down. If you’d told me a year ago that I’d be doing such a thing, I’d have scoffed.

Continue reading

Video Projects Sneak Peek – Concrete Candles and Woven Rag Rug

concrete-candle-rag-rug.png


IN THIS ARTICLE:
Holy soy wax, that’s one spendy candle;
going from rags to rugs is trickier than expected


Concrete (Actually Cement) Candle

People just can’t seem to get enough concrete and cement craft projects these days. So to meet public demand for them, I was tasked with producing a DIY video + tutorial entitled How to Make Concrete Candles. Say what? Concrete candles? Well, they’re actually candles with concrete bases. Like this lovely specimen on Garmentory.com:

NOVEL-STUDIOS-Concrete-Palmarosa-4--Candle-20170329202231.jpg

Beautiful, I thought. Then I saw the price tag. Continue reading

Turn a Tube Sock Into a Microwaveable Scented Heat Pack (Video)

tube-sock-heat-pack-edited

Anxious much? Let this heat pack enfold you in its toasty, rice-weighted, aromatherapy embrace. There there, now. It’ll be ok.


IN THIS ARTICLE:
Heat packs soothe both body and mind; pssst, there’s
an even easier way to make it*


Ah the microwaveable scented heat pack. Humble as it is, I’d put it on a very short list of luxuries that cost next to nothing. But what if you don’t have sore muscles? Doesn’t matter. All you need are muscles.  You’ve got muscles, right? And daily emotional stressors too, I’m guessing? Well, you’ll benefit from this, trust me — especially on a chilly evening. Just nuke it, drape it round your neck and shoulders, light some candles, and succumb to your handmade heatpack’s warm embrace. Continue reading